Software Configuration
By now the user should have a copy of the project on his machine. If not refer to section: Getting Started
Windows Installation
There are two ways of running the software on windows:
- Running the executable
- Running from source
Running the executable
Running the executable is as simple as running the Pump3000.exe located in the <location_to_project>/python_code/dist folder [1] [2].
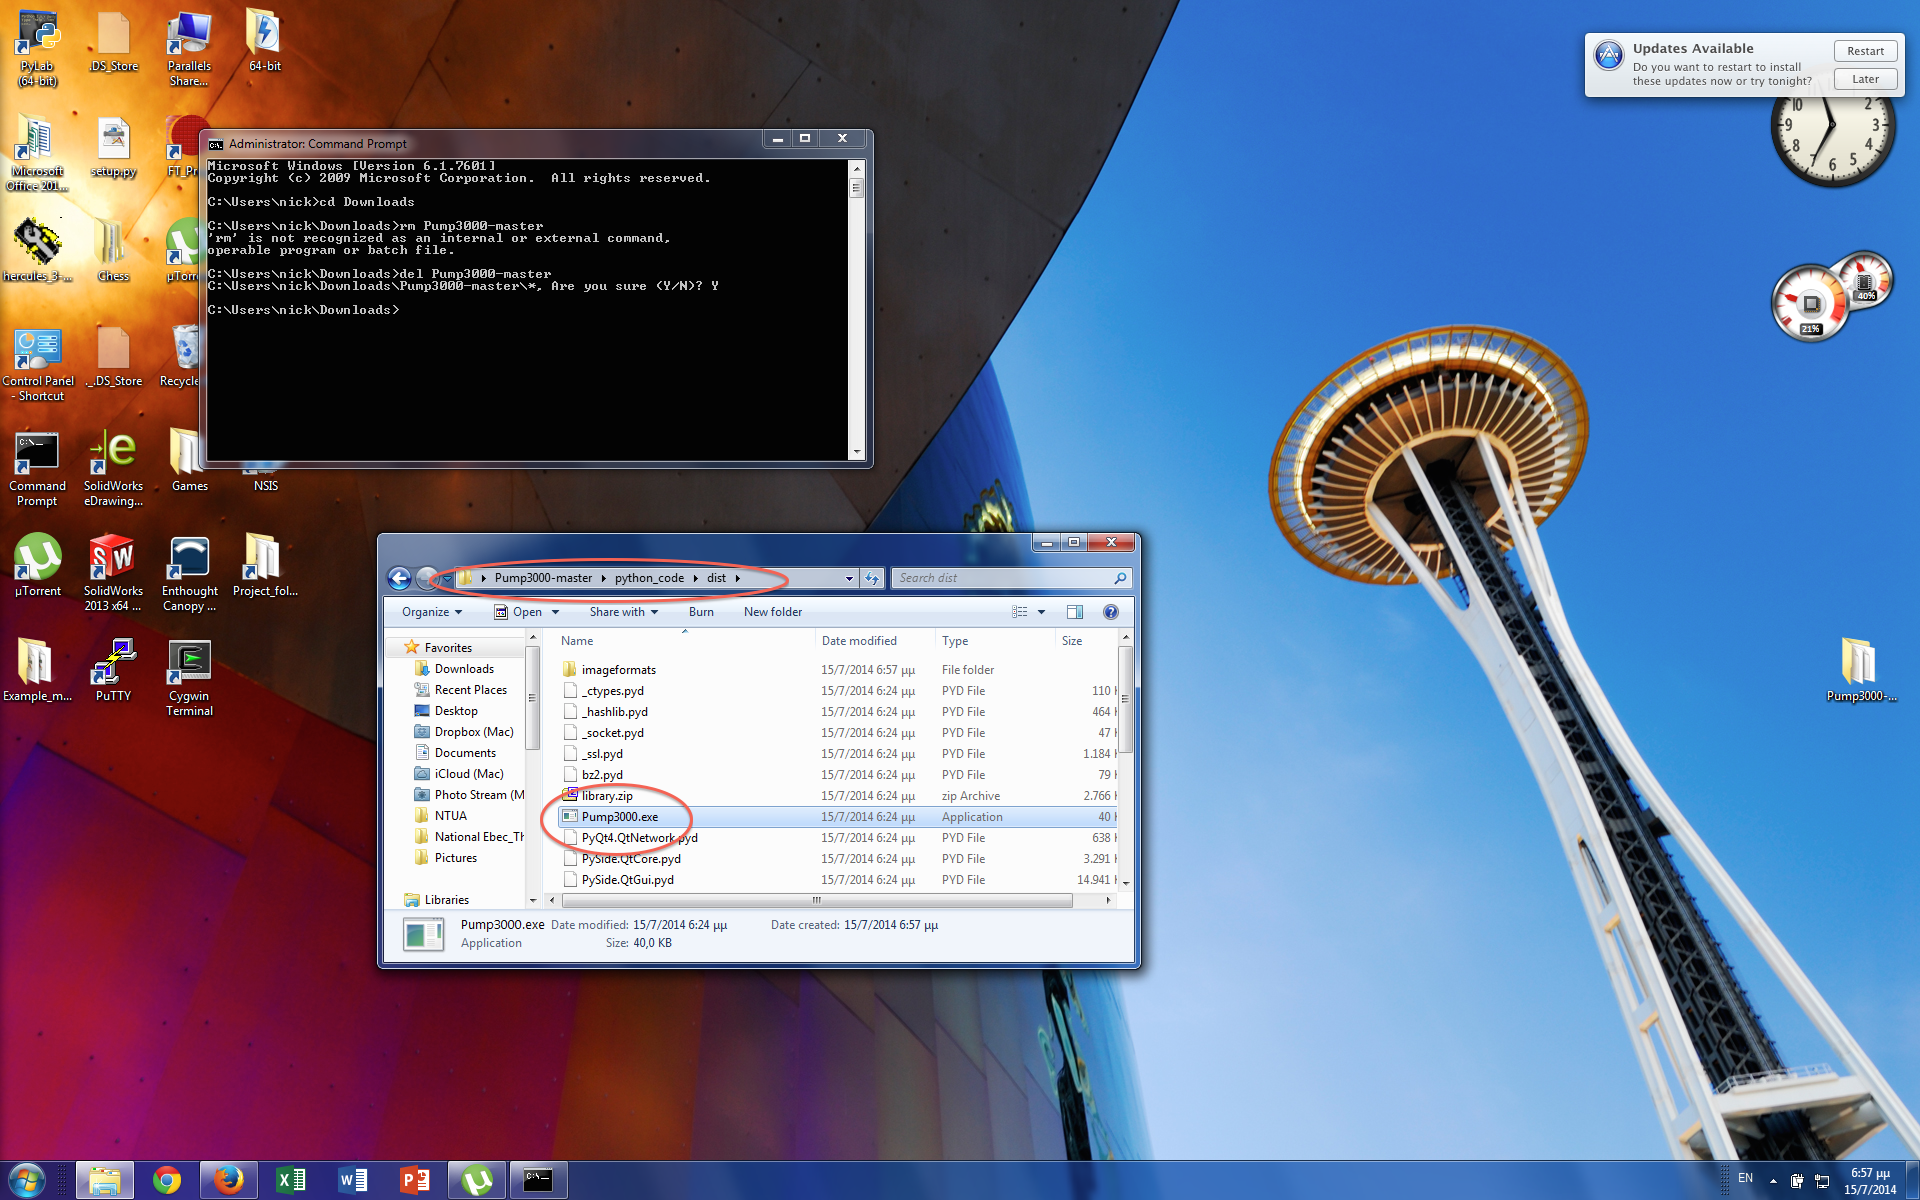
Finding the .exe file
Running from source
Alternatively, the user can run the software from source. This requires the execution of a full python distribution. It is advised that the user uses one of the following distributions due to the simplicity of the installation process
The user must also have the following packages installed:
For the Anaconda distribution the user can install packages from the Command line using one of the following ways [3]
$conda install <package_name>

$pip install <package_name>
Finally, the user should run the software using the command prompt:
python <location_to_project>\python_code\Pump3000.py
Linux/Mac Installation
In case the user wants to run the software from a *NIX environment, a basic python distribution must be installed on the platform, (already preconfigured on most *NIX systems). The user must also have the following packages installed:
After this configuration, the user can run the software from the command-line [*NIX] command-prompt [Windows]:
python Pump3000.py
Note that the user should first go to the folder, the Pump3000.py is located.
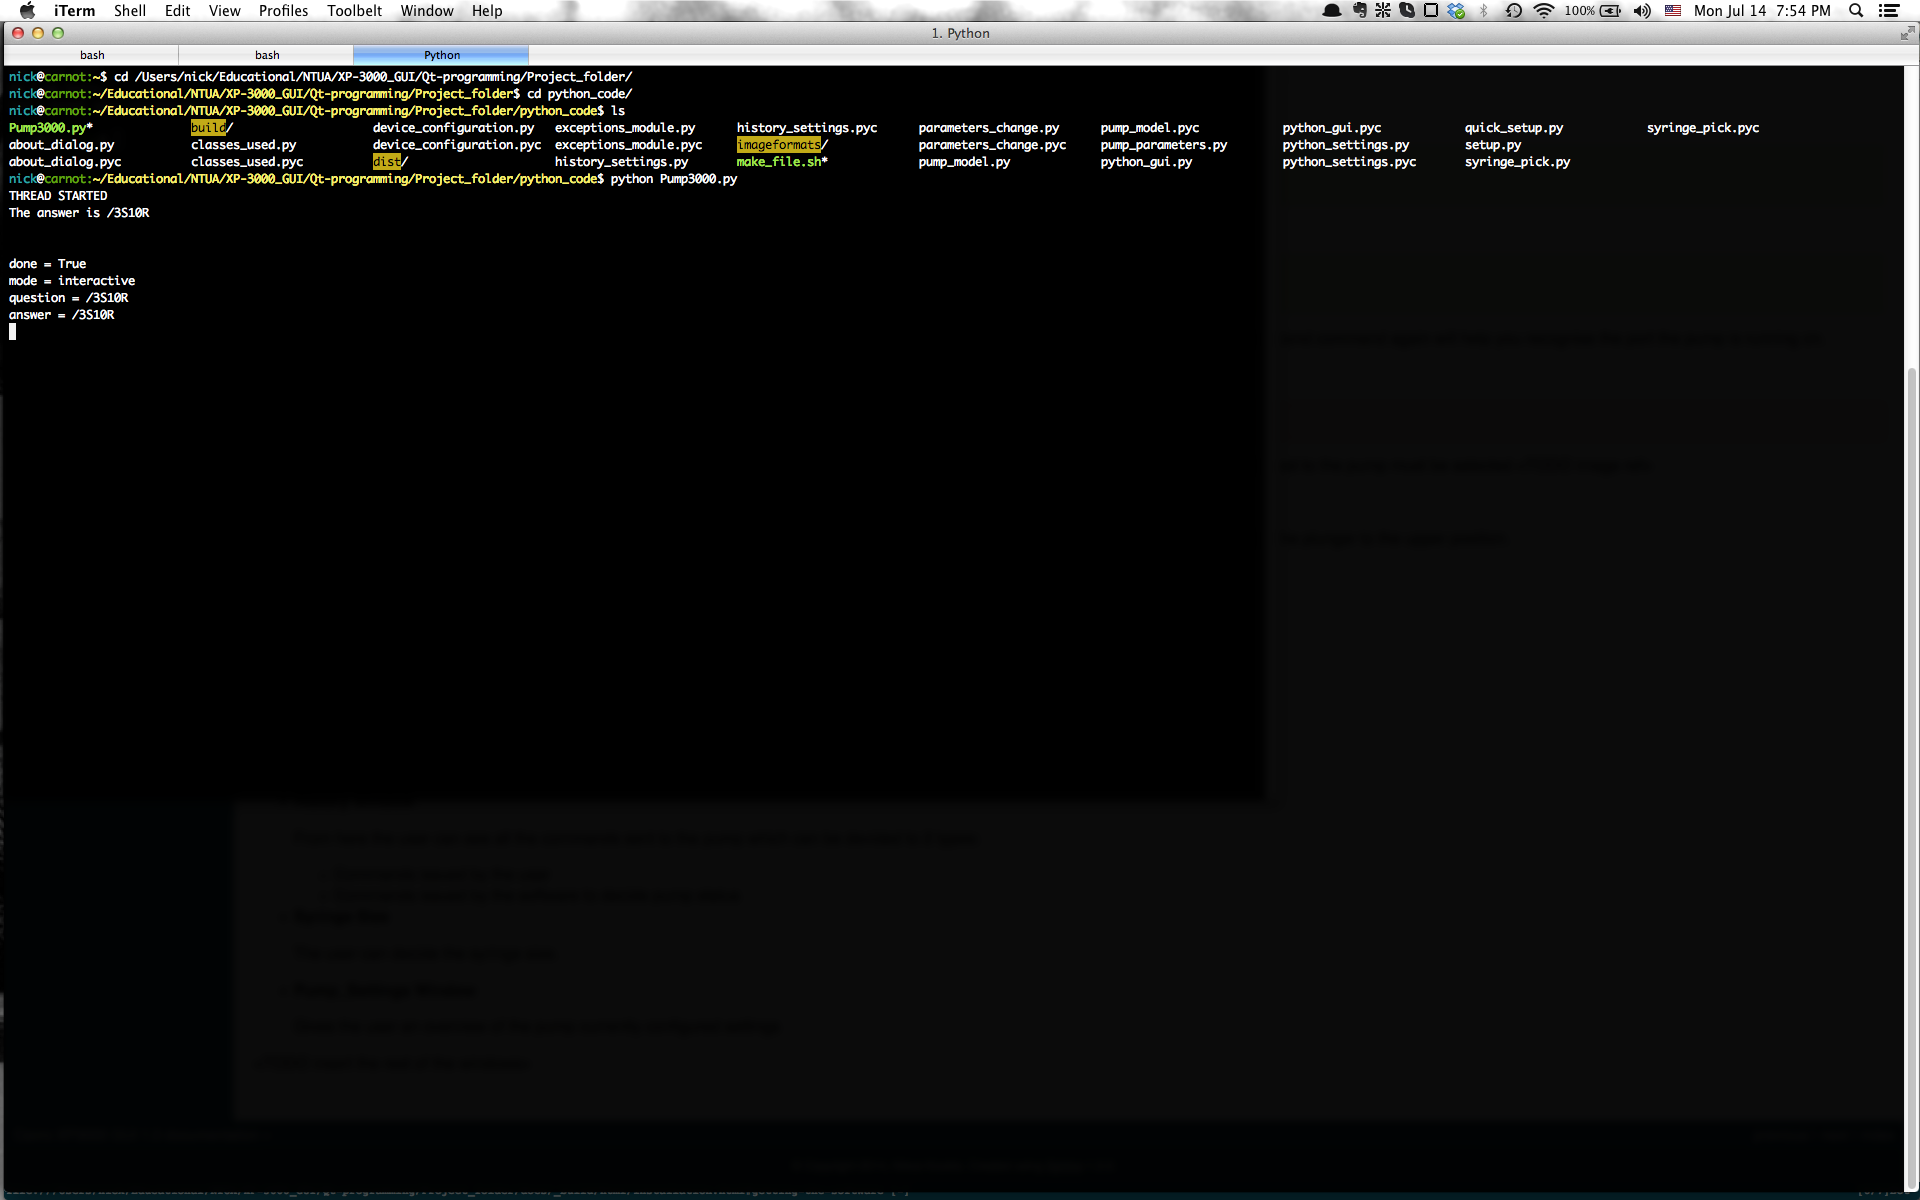
Running from source on MacOS
Using the software
The first thing the user should do, if he doesn’t know the serial connector to the pump, is figure out the correct port:
On Windows machines this can be done by getting the ‘Ports (COM & LPT)’ tab:
Start Menu > right-click "My Computer" > select "Manage" >  Click on the "Device Manager"

(On the "Device Manager") Click "Ports (COM & LPT)" tab > select the port your connector is on
On *NIX machines this can be done the following way:
cd /dev

ls -lart| grep tty
This will give you a list of the currently available ports. Ejecting and reinserting the connector to the computer and in the meantime running the second command again will help you recognise the port the pump is running on.
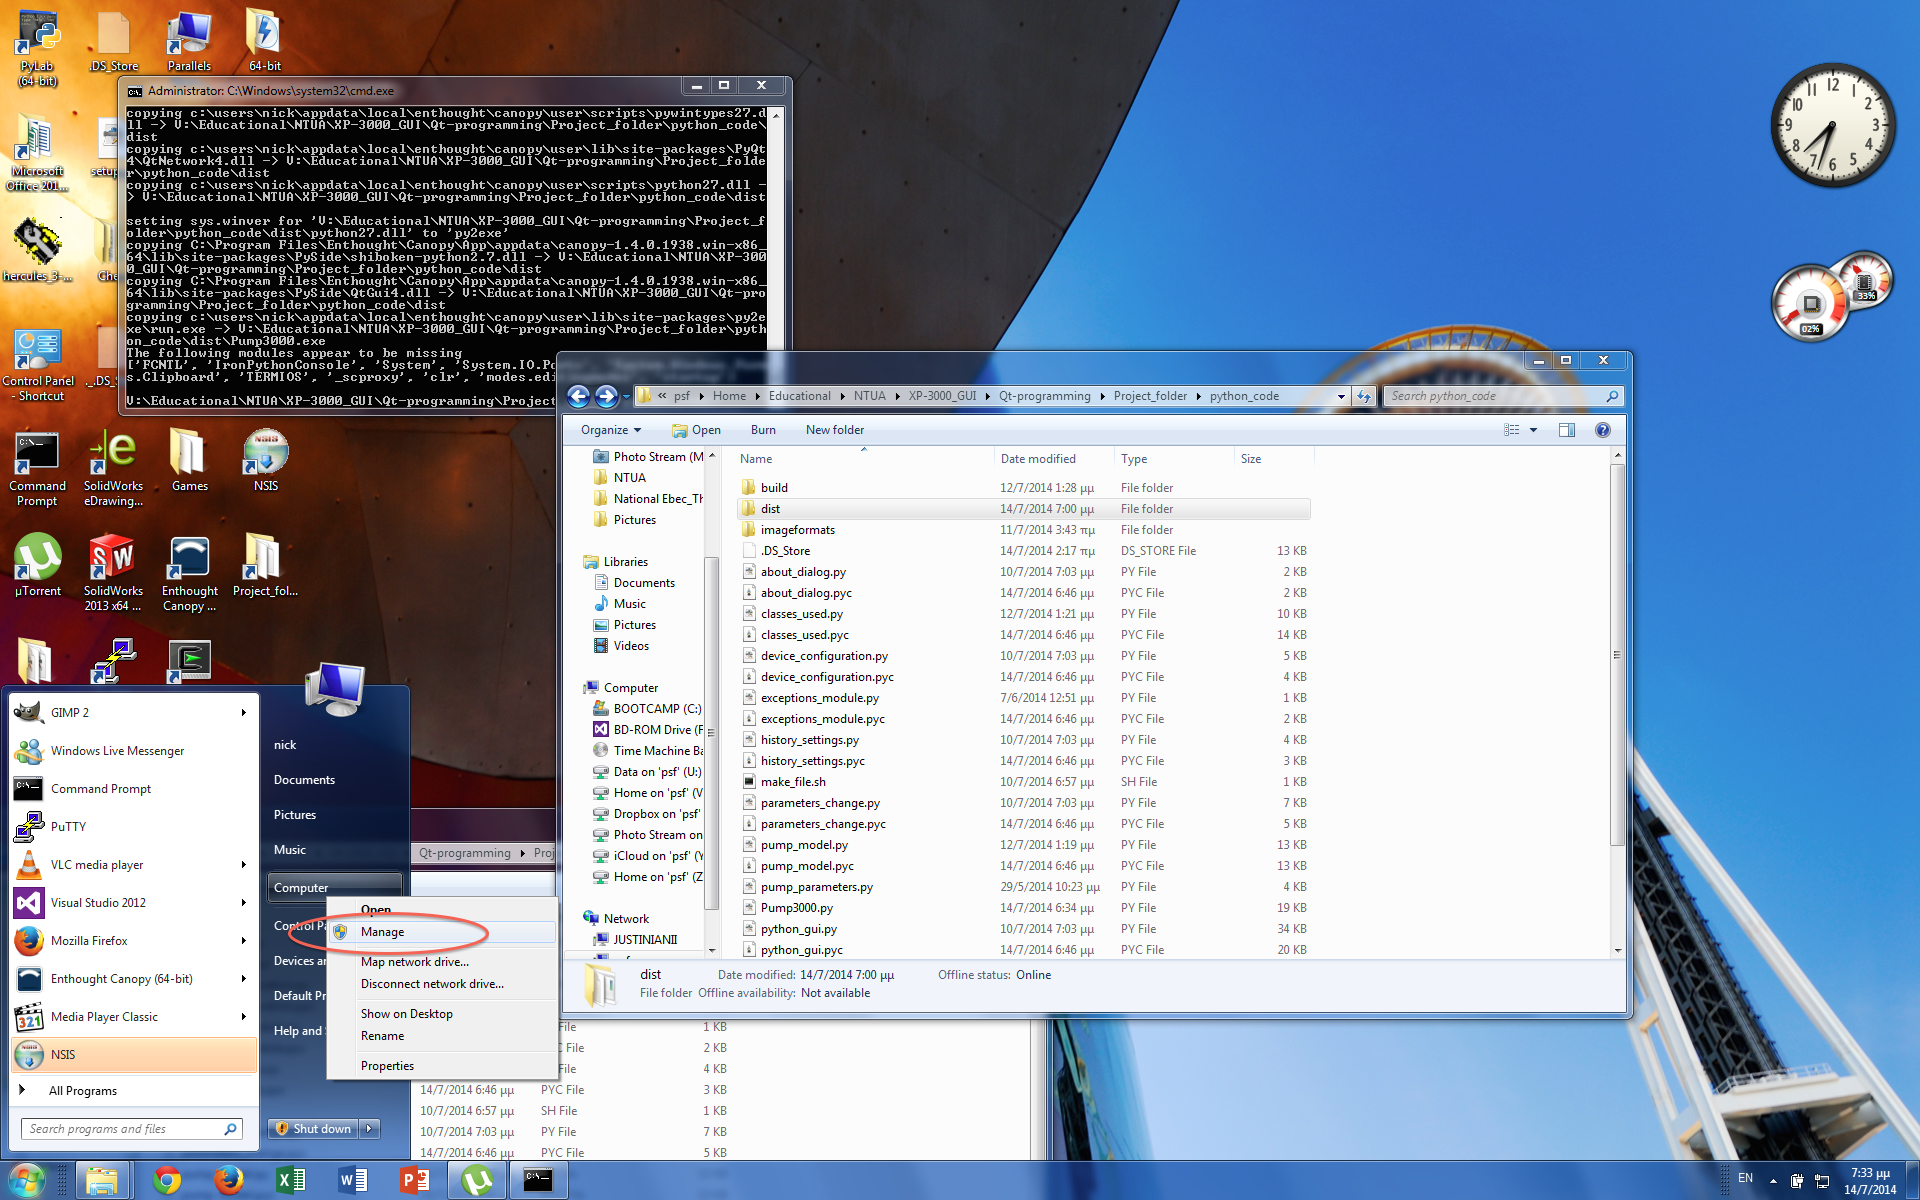
‘Manage’ tab

Configuring COM ports
Warning
Make sure that you have selected the correct port, otherwise the pump will not respond and will not raise any error Message
After that you are ready to run the software (whichever way you want). You should be directed to the New_Device window where the port connected to the pump must be selected
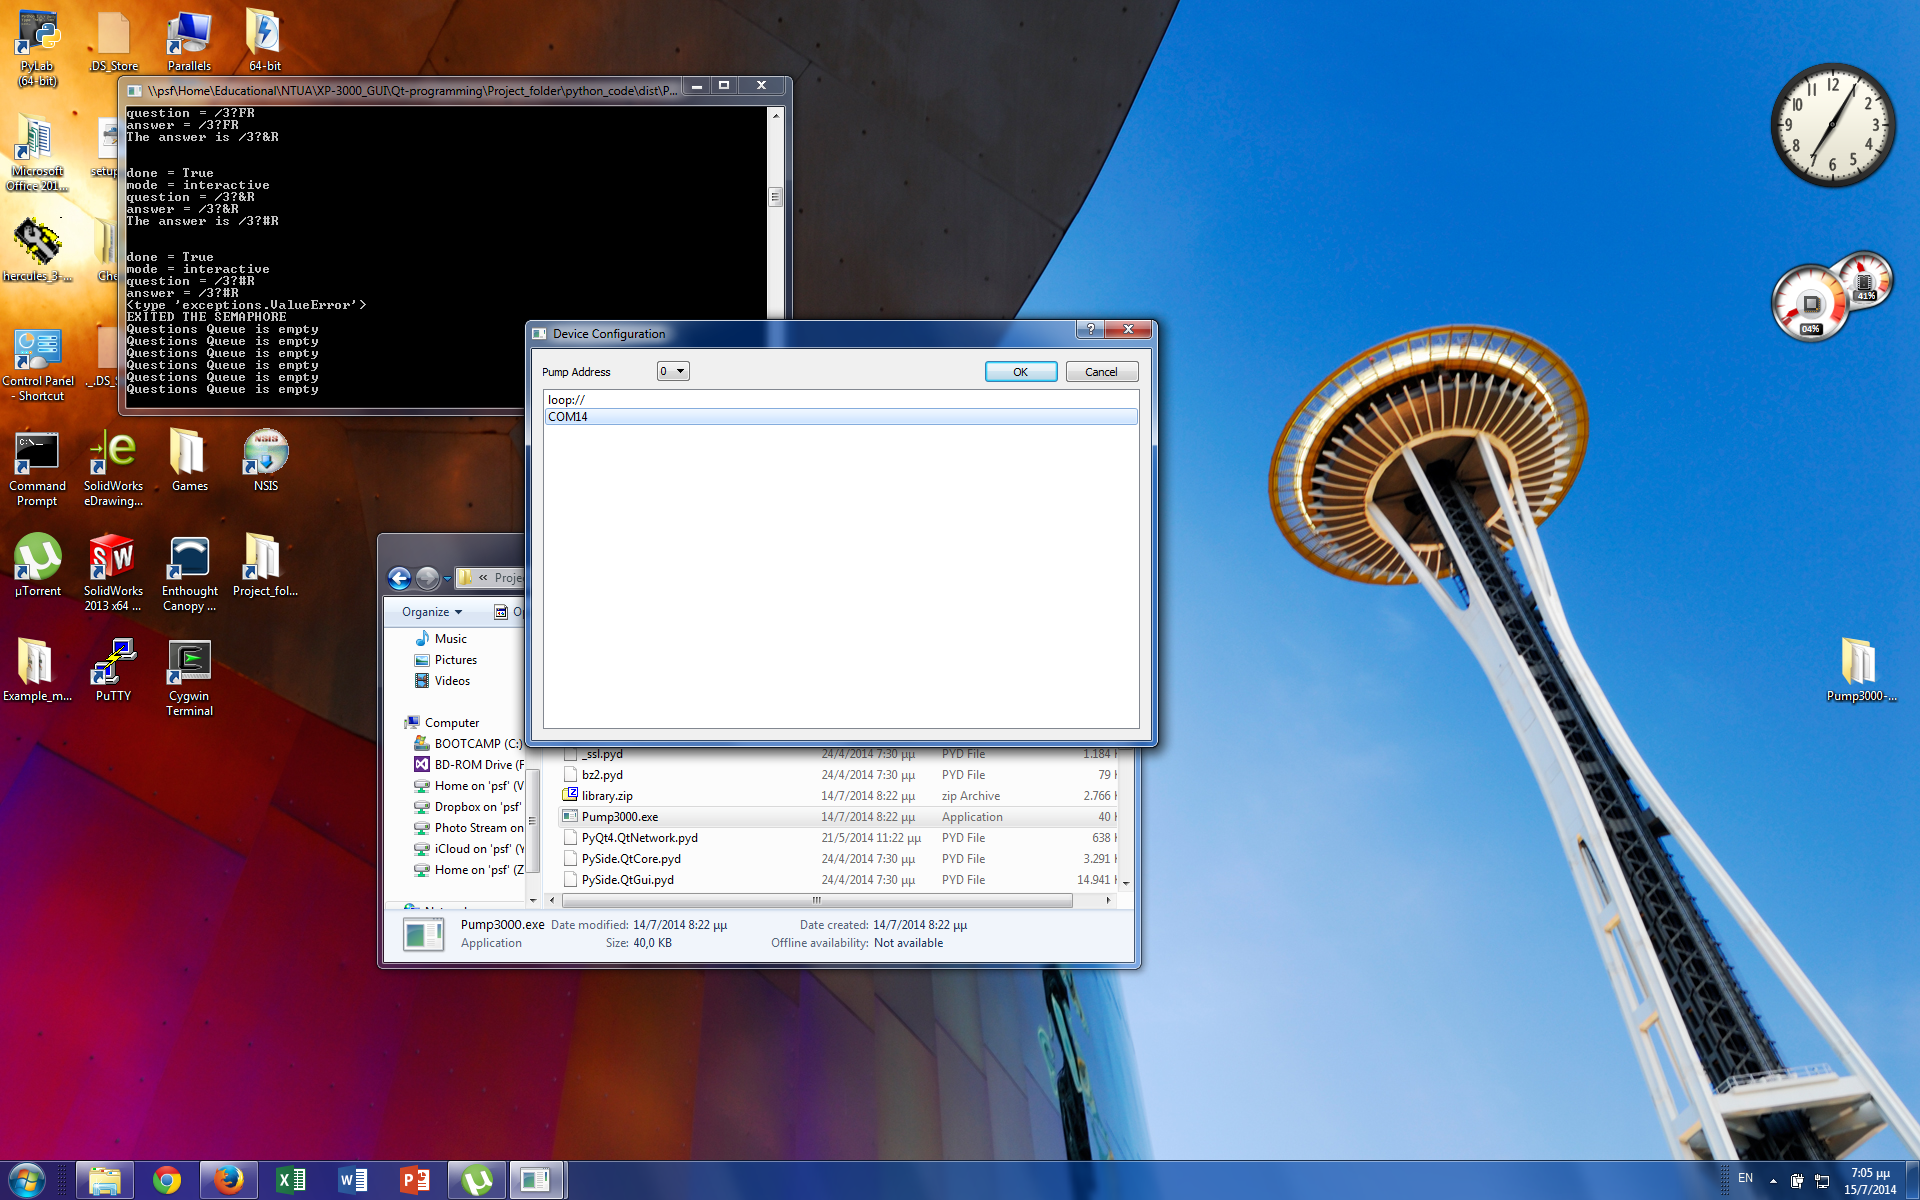
Configuring correct port for pump
If you have selected the correct port, the connection to the pump is established and the software will automatically initialize the pump, by moving the plunger to the upper position.
You are now in the Main Window. From here you can:
- Command a volume delivery,
- Change the speed of the plunger,
- Issue a quick command to the pump (halt, push_all, etc)
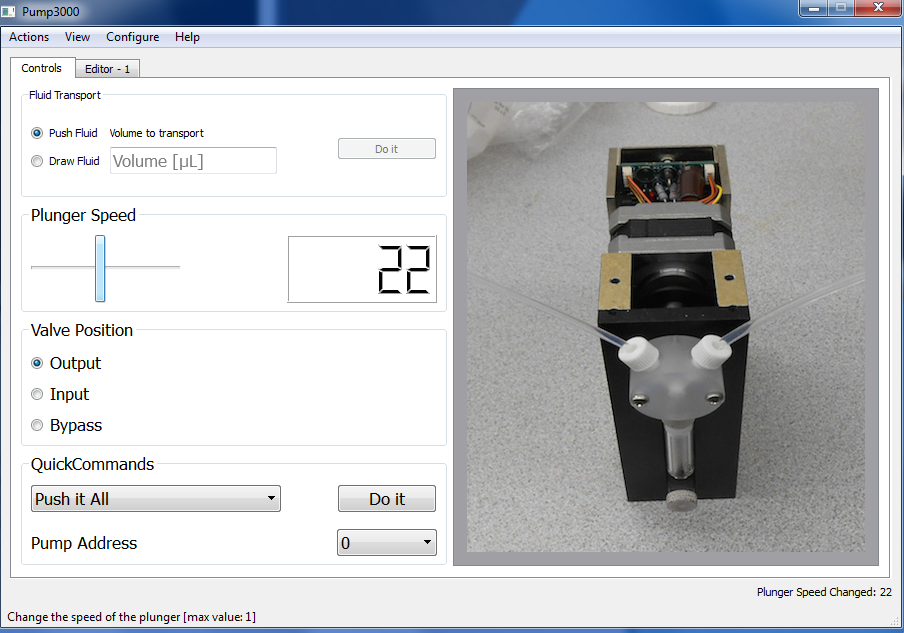
Main window
From the main window you can navigate to a series of other dialogs:
Editor’s Tab
The Editor’s Tab gives the user the ability to issue a series of commands to the pump. These commands are supplied in the “Pump Commands” page. The user can also issue raw pump commands in the same way.
A typical example of issued commands would be the following:
pump.property_set('speed', '5')
# Python Comments, write as many as you want
# Empty lines don't matter

# Raw commands as well
/1?2R\r

pump.send_Command('A0')
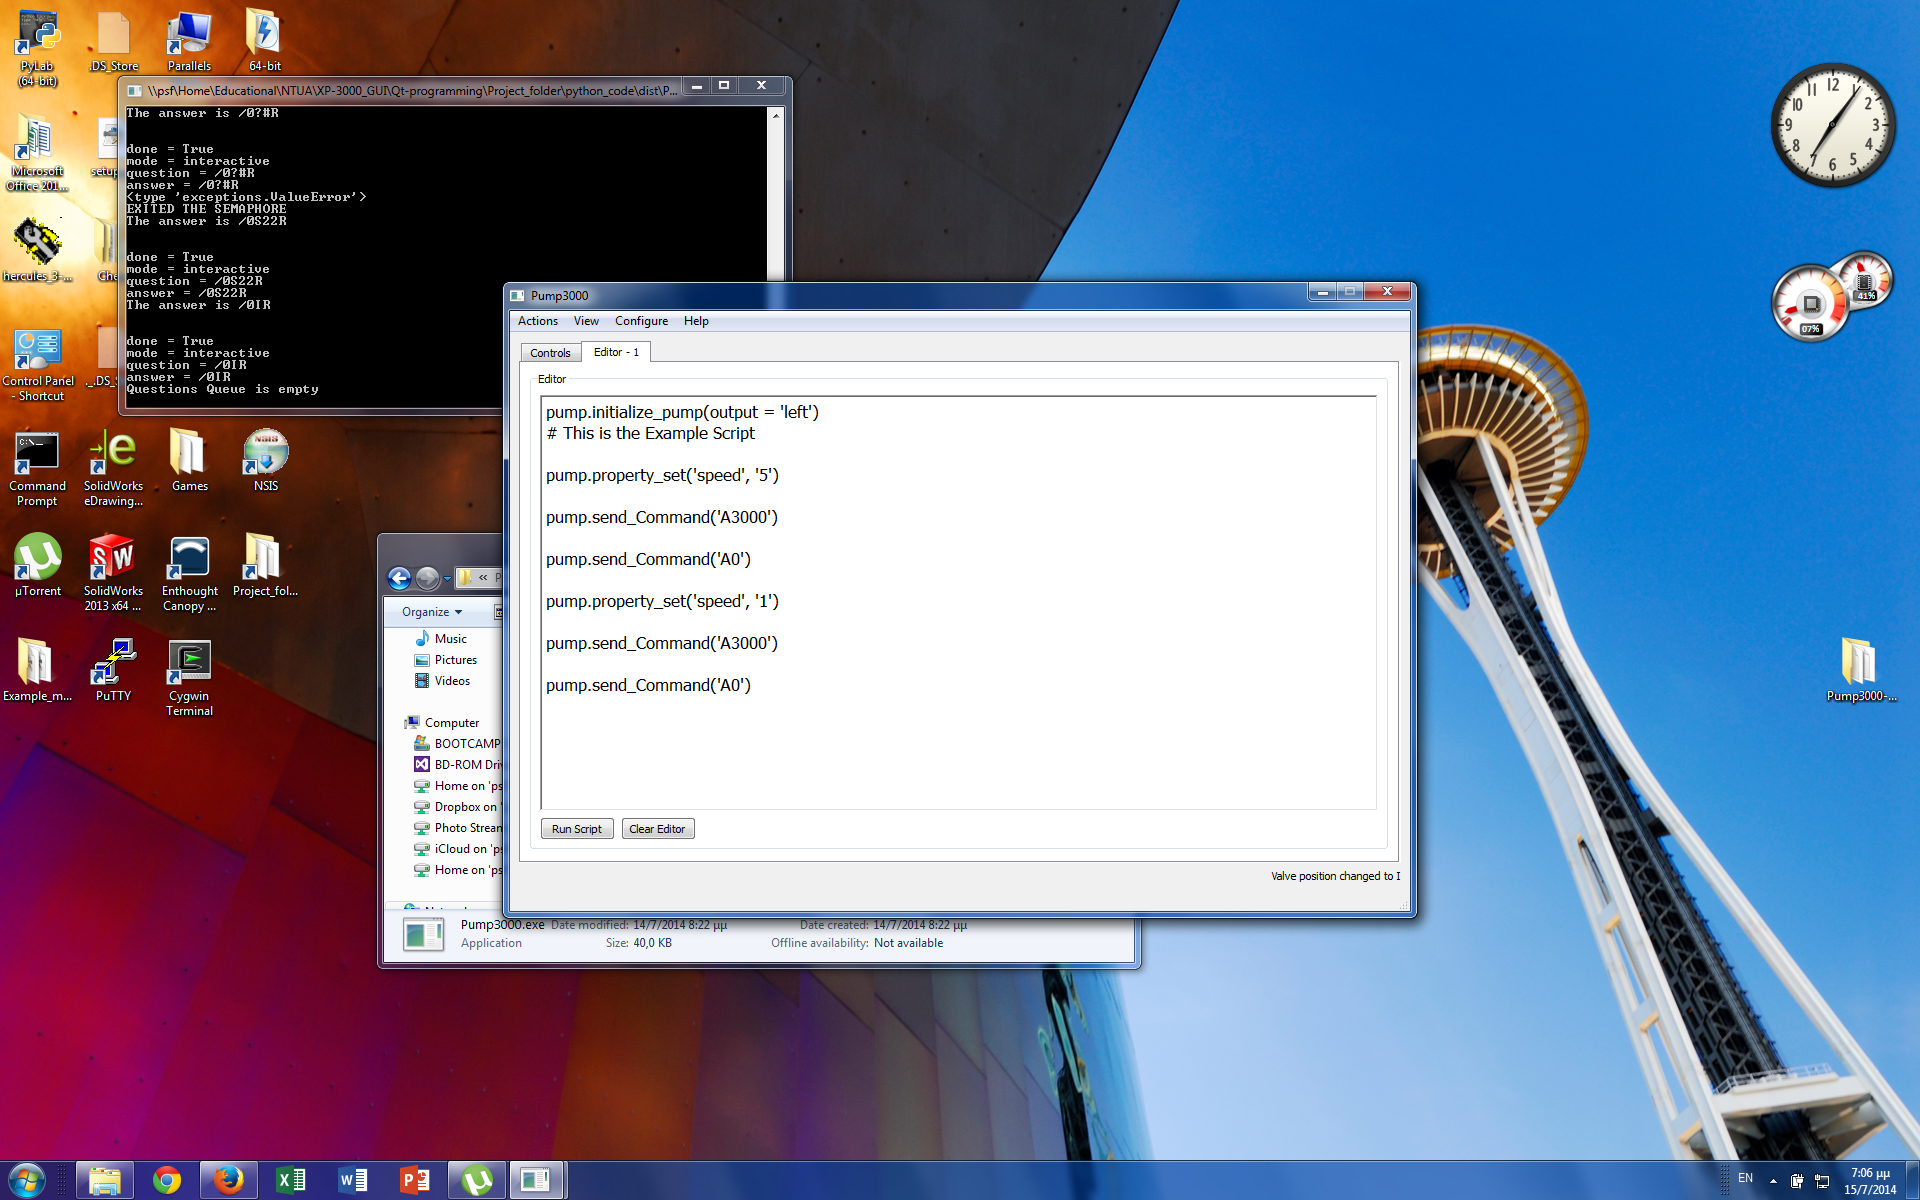
The Editor’s Tab
History
From here the user can see all the commands sent to the pump which can be divided to 2 types:
- Commands issued by the user
- Commands issued by the software to decide pump status
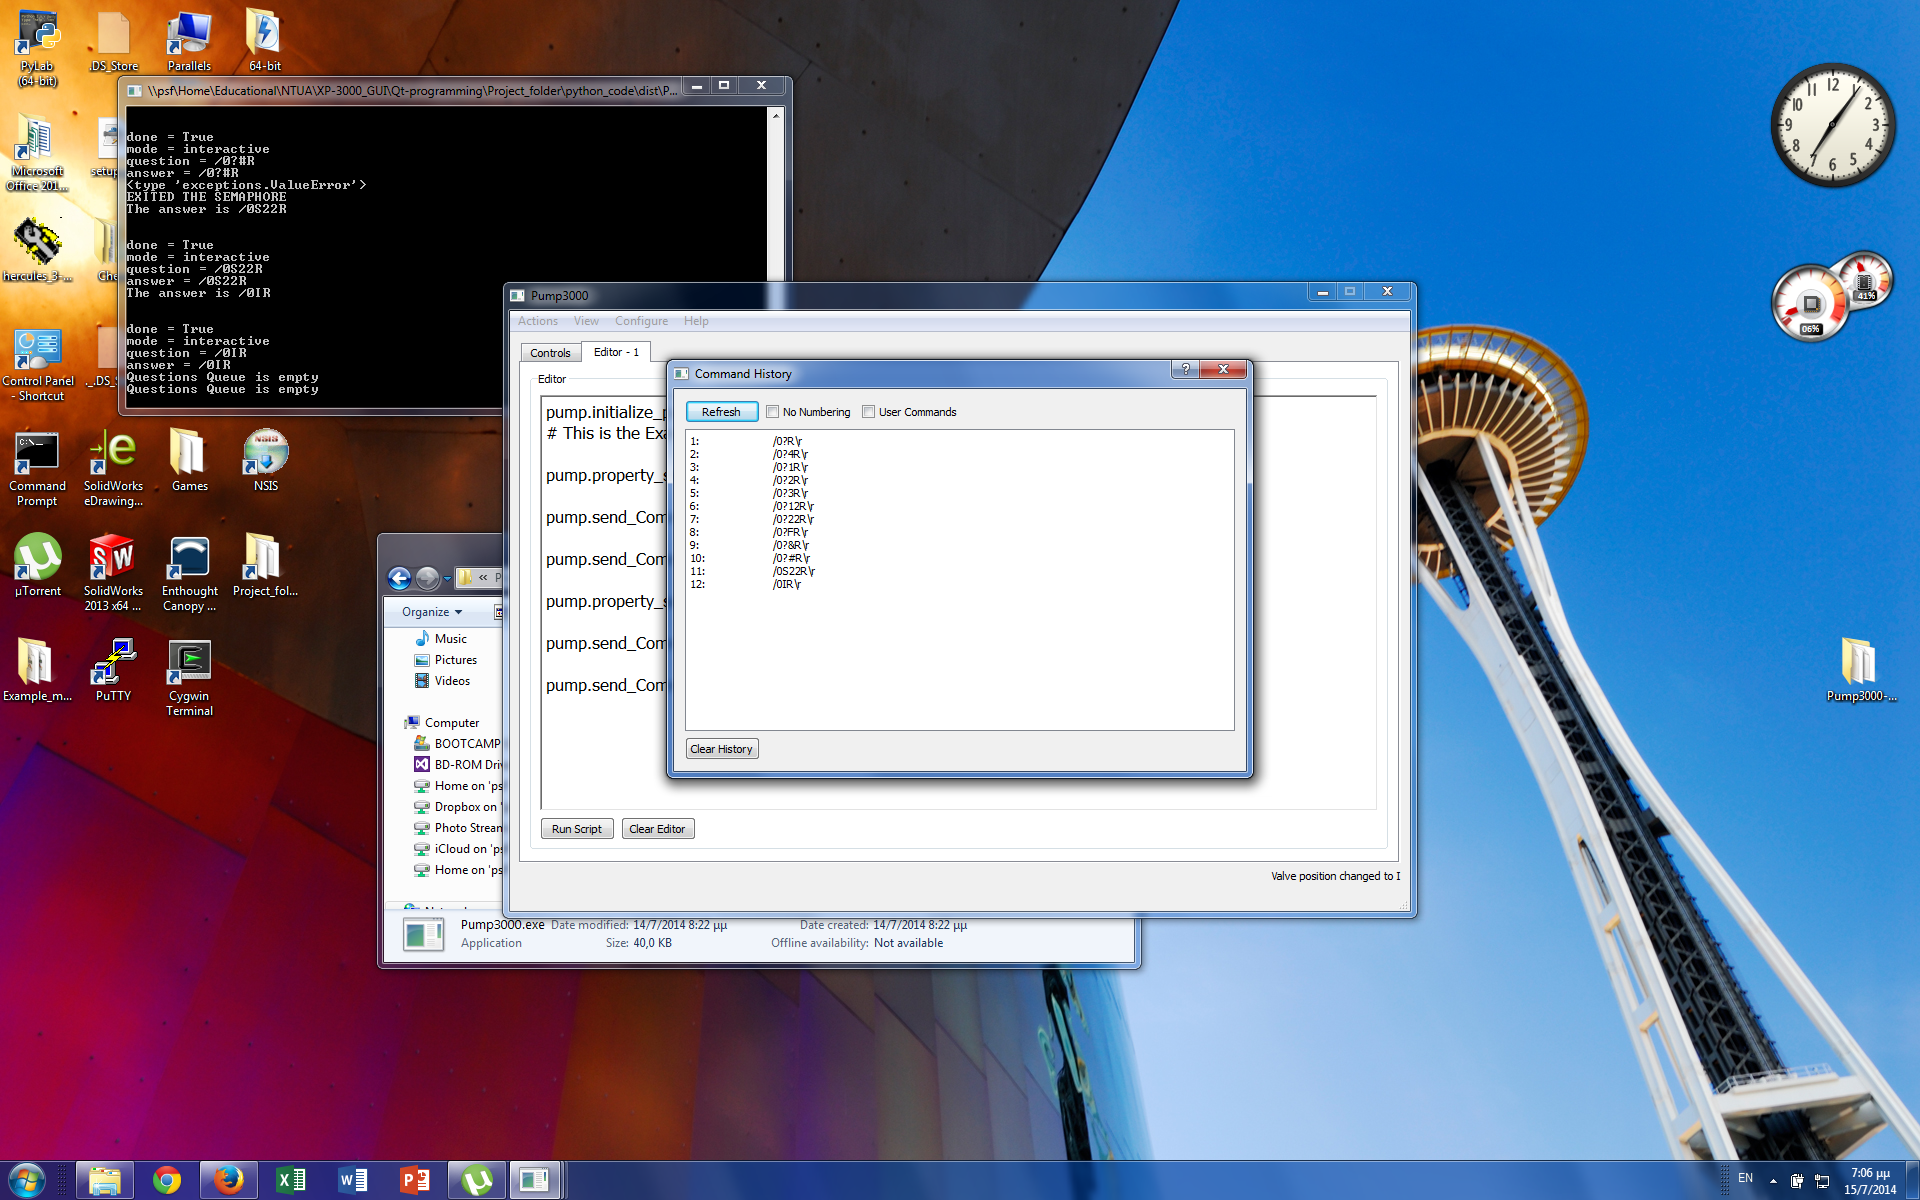
History window
Syringe Size
The user can decide the syringe size.
Reports
Gives the user an overview of the pump currently configured settings

Reports window
Pump Parameters
The user can change certain parameters of the plunger movement such as “Top Velocity”, “Slope” etc.
Port
The user can configure the port that the pump is connected to. This window is also summoned at the start of the Pump30000
Footnotes
| [1] | You can make a shortcut to Pump.exe file but do not move it outside the dist folder as it depends on the dlls files located there |
| [2] | If the executable doesn’t run correctly, try installing the vcredist_XXX file. Replace the XXX with the architecture of your processor. The vcredist files are located in the vcredist directory. After the installation, rerun the executable. If the problem persists, contact me |
| [3] | Consult the instructions on the site of the corresponding distribution for more details on installing packages |